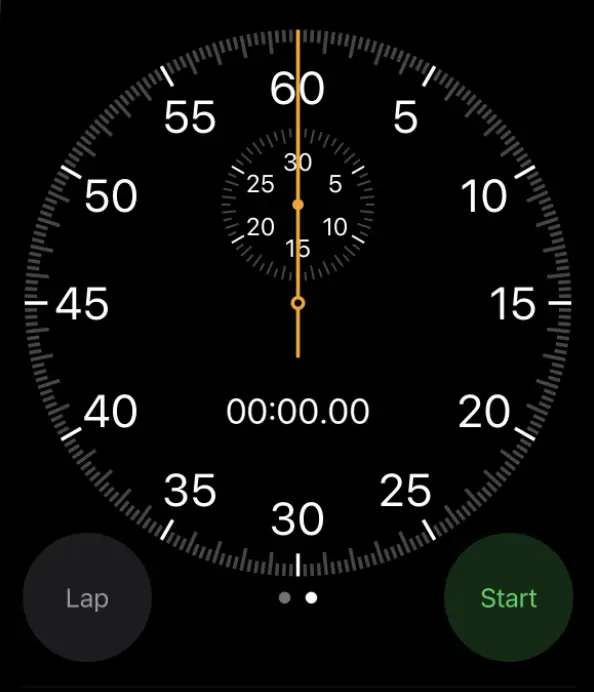
It’s been 3 years since Jetpack Compose first production release came out and I finally got a chance to learn and understand how it works. I tried designing iOS style stopwatch timer to learn and understand how compose works and whether it should be a default choice for all the new UIs being written in Android.
TLDR
Implemented Stopwatch timer clock UI in compose. Project can be found here on Github. Remember to ⭐ if you like it. Its free!
Useful Resources
Following resources were really helpful for me to get started, sharing just in case you are looking for them
Custom views in Compose
While I did spend some time in understanding how basic layouts are designed using Box, Row, Column and other components, I directly jumped into trying to write custom view with some canvas drawing to be done from scratch. Simplest UI which I could think of was stopwatch clock and I took inspiration from iOS Clock app.
Graphics in compose api is pretty simple and straightforward, it provides Canvas composable which provides all necessary apis to draw various shapes.
Stopwatch Implementation
Drawing imaginary circle
For drawing imaginary circle, we need to calculate its centerX and centerY coordinates along with radius. Radius is calculated simply as half of the width of Canvas (skipping extra 16 dp padding). DrawScope in canvas provides us with view bounds which we can use to get necessary data as shown below.
Canvas(
  modifier = modifier
    .fillMaxSize()
    .background(Colors.BLACK.value)
    .padding(16.dp)
) {
    val centerX = size.width / 2f
    val centerY = size.height / 2f
    val circleRadius = size.width / 2
}
Circled notches
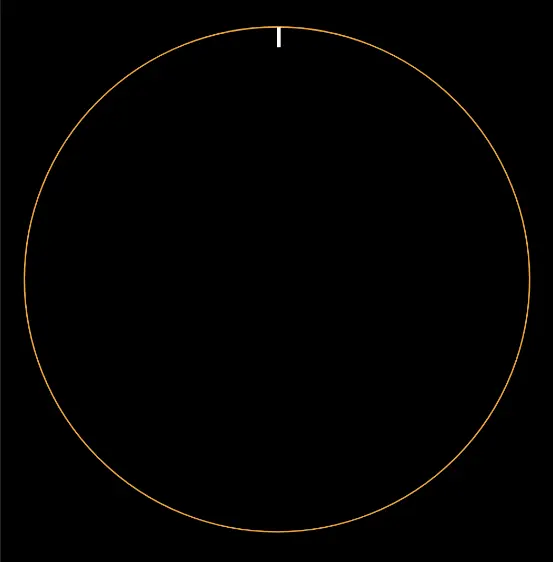
Now that we have center coordinates and radius for our imaginary circle, it’s time to draw notches around the edges of circle which will form circular structure for clock. Let’s try to draw single notch at the edge of circle. Using geometry, we can figure out x,y coordinates circle perimeter with formula.
x = circleCenterX + radius * cos(angleInRadians)
y = circleCenterY + radius * sin(angleInRadians)
//circle is drawn just for visualizing placement of notch
drawCircle(color = Colors.YELLOW.value, radius = circleRadius, center = Offset(centerX, centerY), style = Stroke(width = 2f))

drawRect(
  color = PRIMARY_NOTCH_COLOR,
  topLeft = Offset(
    centerX + circleRadius * cos(270f.degreesToRadians()),
    centerY + circleRadius * sin(270f.degreesToRadians())
  ),
  size = Size(ROTATING_HAND_WIDTH / 2f, PRIMARY_NOTCH_LENGTH),
)
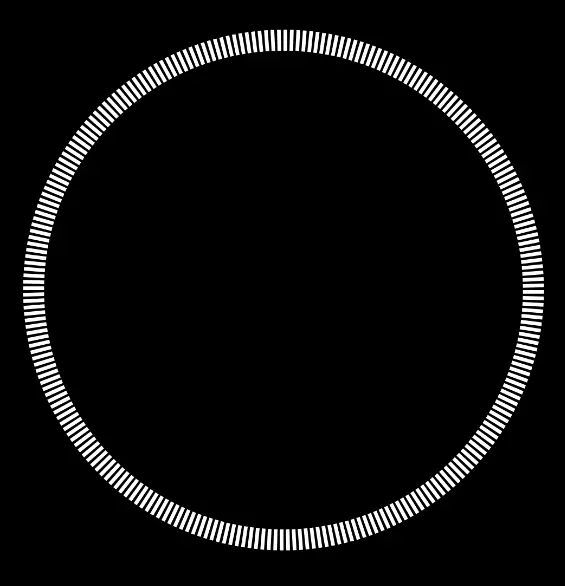
Now we need to repeat this notch drawing for 252 times (Circle is divided in 12 parts with each part having 21 notches, so total 21 * 12= 252 notches).
repeat(252) {
  val circlePerimeterAngle = 270f + (360f / NOTCH_COUNT) * it
  drawRect(
    topLeft = Offset(
      centerX + circleRadius * cos(circlePerimeterAngle.degreesToRadians()),
      centerY + circleRadius * sin(circlePerimeterAngle.degreesToRadians())
    ),
    /*skipping for brevity*/
  )
}

As seen above, 252 notches are drawn but they are overlapping each other and are not exactly how we want them to be. We need to rotate each notch corresponding to the angle at which they are placed with respect to center. We use rotate function on each notch to achieve this.
repeat(NOTCH_COUNT) { notchNumber ->
    val circlePerimeterAngle = 270f + (360f / NOTCH_COUNT) * notchNumber
    rotate(circlePerimeterAngle + 90f, /*skipping for brevity*/) {
        drawRect(/*skipping for brevity*/)
    }
}
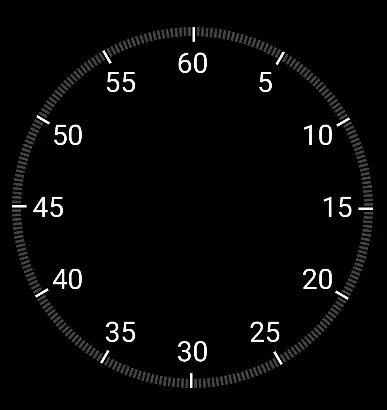
Putting everything together and adding small logic to have smaller length for secondary notches, we get our notched circle.
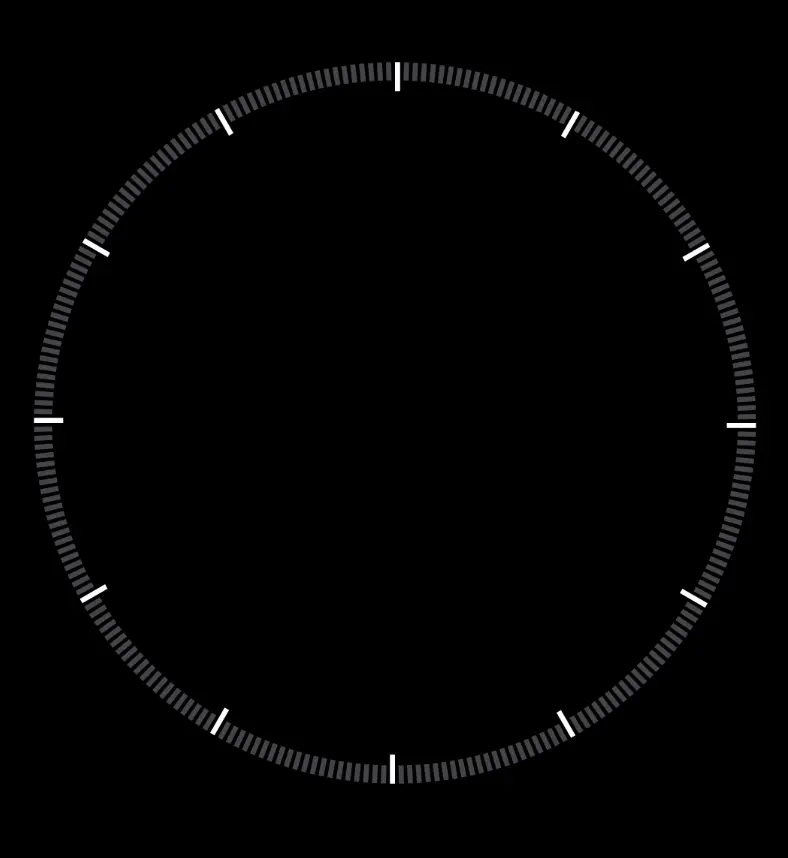
Placement of seconds count
In repeat loop, for every 5 second mark, need to draw a number beside that notch. Used drawText api to style the text and place it just inside the outer radius of circle using some offsets.
if (notchNumber.isDivisible(hourInterval)) {
    val p1 = centerX + 0.8f * circleRadius * cos(circlePerimeterAngle.degreesToRadians())
    val p2 = centerY + 0.8f * circleRadius * sin(circlePerimeterAngle.degreesToRadians())

    val s = if (notchNumber == 0) "60"
    else (notchNumber.div(hourInterval).times(5)).toString()
    val tr = textMeasure.measure(
        AnnotatedString(s),
        style = TextStyle(fontSize = 28.sp, color = Colors.WHITE.value)
    )
    drawText(
        tr,
        topLeft = Offset(
            p1 - tr.size.width / 2,
            p2 - tr.size.height / 2,
        )
    )
}
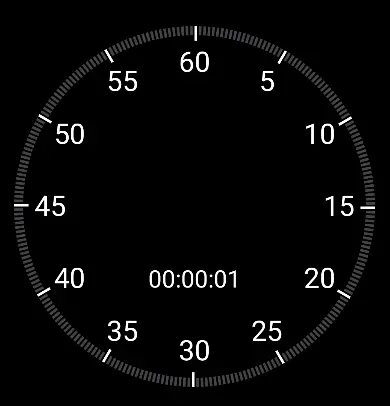
Timer text
Rendering timer text was pretty straightforward. Used hardcoded offset to push it vertically down from the center of circle.
val tr = textMeasure.measure(
    AnnotatedString(currentTimeState.toHms()),
    style = TextStyle(fontSize = 24.sp, color = Colors.WHITE.value)
)
drawText(
    tr,
    topLeft = Offset(
        centerX - tr.size.width / 2,
        centerY - tr.size.height / 2 + 200f
    )
)
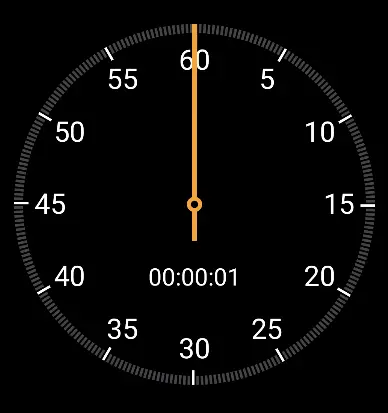
Rotating hand of clock
Now for the most important part of a clock, rotating hand, need to draw a rect which extends from center of the circle towards both the sides. One side touches the edge of the circle while other just extends for some distance. Also, to be able to rotate this hand when timer starts, created a variable currentTimeState which can control its placement relative to current time. Pivot to rotate this hand would be center of circle. Following snippet draws hand placed at reset position (zero) with initial time at 0 milliseconds. At timer starts and currentTimeState starts increasing, degrees variable for rotate function starts updating itself to move hand to correct position.
rotate(
    currentTimeState.toRange0To360() + 270f,
    pivot = Offset(centerX, centerY)
) {
    drawRect(
        color = Colors.YELLOW.value,
        topLeft = Offset(
            centerX - ROTATING_HAND_EXTENSION,
            centerY - ROTATING_HAND_WIDTH / 2
        ),
        size = Size(circleRadius + ROTATING_HAND_EXTENSION, ROTATING_HAND_WIDTH),
    )
}

Center stroked circle
At the center of clock, there is circle with stroke in iOS clock app. There were 2 ways in achieving this, drawing 2 rectangles to make up rotating hand separately or use some hack to draw stroked circle with single rotating hand. I used a hack to keep single rect for rotating hand. I drew 2 circles on top of each other to achieve the results. Black circle emulates hollow space by drawing over rotating hand.
drawCircle(
    color = Colors.YELLOW.value,
    radius = 14f,
    center = Offset(centerX, centerY),
    style = Stroke(width = ROTATING_HAND_WIDTH)
)
drawCircle(
    Colors.BLACK.value,
    radius = 10f,
    center = Offset(centerX, centerY)
)
Addition of motion to rotating hand
Adding motion to our stopwatch involves updating currentTime variable to elapsed time in milliseconds. To be able to know current timer state, I used live data to send updates to Composable from activity. Observables can be converted to compose states by following this documentation. I used LiveData instead of Flow due to its simplicity to use, but anything can be used (Flow, RxJava etc)
fun StopWatch(
    modifier: Modifier = Modifier,
    currentTime: MutableLiveData<Long>,
) {
    //UI
}
Used some extension functions (thanks to ChatGpt) to convert milliseconds time to mm:ss:ms for timer text and angle for rotating hand.
@SuppressLint("DefaultLocale")
fun Long.toHms(): String {
    val minutes = this / 60000
    val seconds = (this % 60000) / 1000
    val milliseconds = (this % 1000) / 10

    return String.format("%02d:%02d:%02d", minutes, seconds, milliseconds)
}

fun Long.toRange0To360(): Float {
    return this / 1000f * (360f / 60f)
}
Added timer functionality in Activity using SystemClock.elapsedTime to trigger timer on tap of Composable to achieve following result.
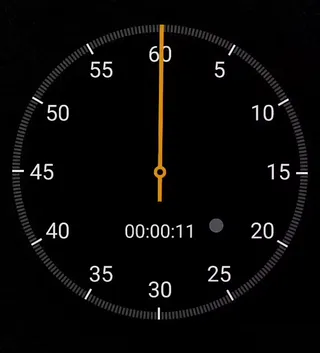
Composable took approx 150 lines to achieve above result. Complete project can be found here.
Takeaways
There were a lot of takeaways for me from this small exercise
100% kotlin codebase
- Biggest takeaway was achieving whole UI with 100% kotlin code without single line of XML.
- XML has been defacto standard for android views since forever and I really felt that compose made it easier and faster for me to write this custom view.
- Lot of boilerplate which comes with XML is gone like reading XML to kotlin, defining attributes files for custom view attributes etc.
Live Preview
- Live previews while we write composable functions makes it easier to follow along with trial and error. XMLs also provide previews, but they are not as good as this. Also one cannot compare writing kotlin vs writing XMLs.
Managing view state is easier
- Some learning curve is there for understanding recommended way to manage states (specially side effects), but once comfortable, they are very powerful and helps us in writing better integration of data with ui states.
Thank you!
I have uploaded complete code here in case you want to run it locally or use it in one of your projects. Remember to ⭐ if you like it!